Top 5 New Construction Inspection Issues and Solutions
New construction inspections are your crucial first look at a newly built home’s condition before you officially accept it. They’re designed to uncover those hidden construction flaws that could compromise your home’s safety and long-term value. This guide will walk you through what a new construction inspection entails, why even brand-new homes can develop issues like foundation cracks, plumbing leaks, electrical problems, HVAC installation errors, and roofing defects, and how catching these early protects both buyers and agents. You’ll learn practical signs to spot during your walkthroughs, get step-by-step advice on remediation and negotiation language, and understand the best timing for inspections, like pre-drywall and final checks. We’ll cover the top five defect categories, dive into detection methods (including infrared thermal imaging and drone inspections), provide workflows specifically for agents, and explain your next steps once findings are documented. We’ve also woven in key terms like “new construction buyer inspection benefits,” “new home foundation problems Florida,” “electrical code violations new construction,” “HVAC ductwork issues new build,” and “roof flashing defects new house” to help you pinpoint the most critical areas and remediation paths.
Why Is a New Construction Inspection Essential for Buyers and Real Estate Agents?
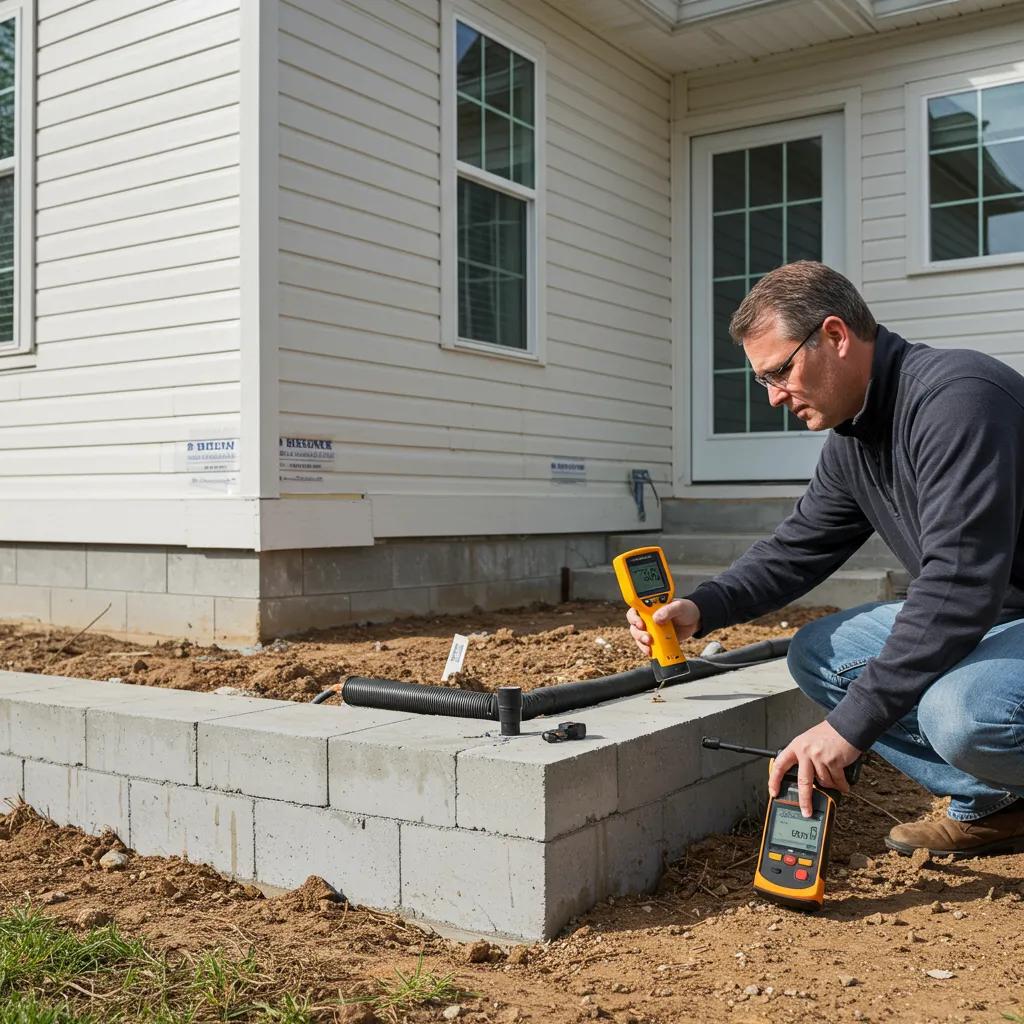
A new construction inspection is an independent assessment of your property’s condition, verifying the quality of workmanship, systems, and components in your recently built home. It combines a thorough visual review with specialized tools to pinpoint defects before you finalize the purchase. This process ensures that issues—like moisture intrusion or miswired circuits—are identified early. The benefit for buyers and agents? You get clear documentation to support builder corrections and warranty claims. Inspections significantly reduce risks to safety, financial exposure, and professional reputation by transforming vague concerns into concrete, documented findings. Modern practices emphasize phase inspections, such as pre-drywall and final walkthroughs, to catch problems early and strengthen your negotiating position with the builder.
What hidden defects inspections commonly reveal directly informs the types of issues buyers should anticipate and the most effective times to schedule inspections for maximum protection.
H3: What Hidden Defects Can New Construction Inspections Reveal?
Hidden defects in new builds frequently include structural framing errors, concealed plumbing leaks, HVAC misinstallations, and moisture intrusion that aren’t visible without specialized equipment. Inspectors use a combination of visual checks and instruments to uncover various construction defects, such as foundation cracks, plumbing leaks, and electrical wiring errors. Infrared thermal imaging can detect moisture or missing insulation, camera scopes can reveal hidden plumbing problems, and drone inspections can uncover roof flashing defects that are hard to see from the ground. These discoveries protect buyers by turning potential long-term liabilities into immediate repair requests backed by photographic and thermal evidence.
Understanding these detection methods highlights how inspections safeguard your investment and ensure safety through documented remediation paths.
H3: How Do Inspections Protect Your Investment and Ensure Safety?
Inspections protect your investment and safety by providing prioritized, evidence-backed findings that minimize the likelihood of costly deferred repairs and safety hazards after you move in. Addressing detected defects early—like correcting improper grading or fixing electrical wiring errors—typically costs a fraction of the long-term repairs that unresolved issues would cause, and the documentation strengthens your warranty claims with the builder. Prioritized reports highlight safety-critical items, such as electrical code violations and HVAC installation errors, which could pose fire risks or impact indoor air quality. Clear photographic and thermal deliverables empower buyers and agents to present concise repair requests and timelines, preserving resale value and occupant safety.
The benefits of proper inspection timing clarify when to schedule phase and final reviews for maximum leverage.
H3: When Is the Best Time to Schedule a New Construction Inspection?
The ideal timing for a new construction inspection includes a pre-drywall (phase) inspection and a final inspection near completion, offering two key opportunities for remediation. A pre-drywall inspection verifies structural framing, mechanical routing, insulation placement, and rough plumbing/electrical work before finishes conceal them; catching issues at this stage allows for cheaper, less disruptive fixes. A final inspection confirms that repairs have been completed and that visible items—like roofing, flashing, finishes, and HVAC performance—meet established standards before you close. Coordinating inspections with builder walkthroughs and scheduling them early reduces delays and provides agents with the necessary documentation to negotiate timely corrections.
Scheduling guidance leads directly into the top five defects typically found during these inspections.
What Are the Top Five Common Issues Found During New Construction Inspections?
New construction inspections most frequently uncover five clusters of defects: foundation problems, plumbing defects, electrical errors, HVAC installation issues, and roofing/exterior flaws. Each of these can lead to consequences ranging from minor cosmetic repairs to major structural or safety concerns. These defect clusters represent common construction flaws and relate to specific components like the foundation slab, drainage system, electrical panel, HVAC ductwork, and roof flashing. The list below provides a quick overview with one-line consequences to help buyers and agents prioritize concerns during walkthroughs.
- Foundation Issues: Can lead to settlement, misaligned doors/windows, and structural movement.
- Plumbing Defects: Cause leaks, mold, and water damage that worsen over time.
- Electrical Problems: Create safety hazards including shock and fire risk from improper wiring.
- HVAC Installation Errors: Produce poor comfort, high energy bills, and premature equipment failure.
- Roofing and Flashing Defects: Result in water intrusion, rot, and exterior finish failures.
The table below compares these top issues with typical signs and repair expectations to aid quick decision-making.
Before the table: this EAV-style comparison summarizes detection, impacts, and rough repair scale to inform immediate prioritization.
This comparison highlights severity and typical allocations for remediation, guiding where immediate negotiation focus should lie.
H3: How Do Foundation Issues Affect New Homes?
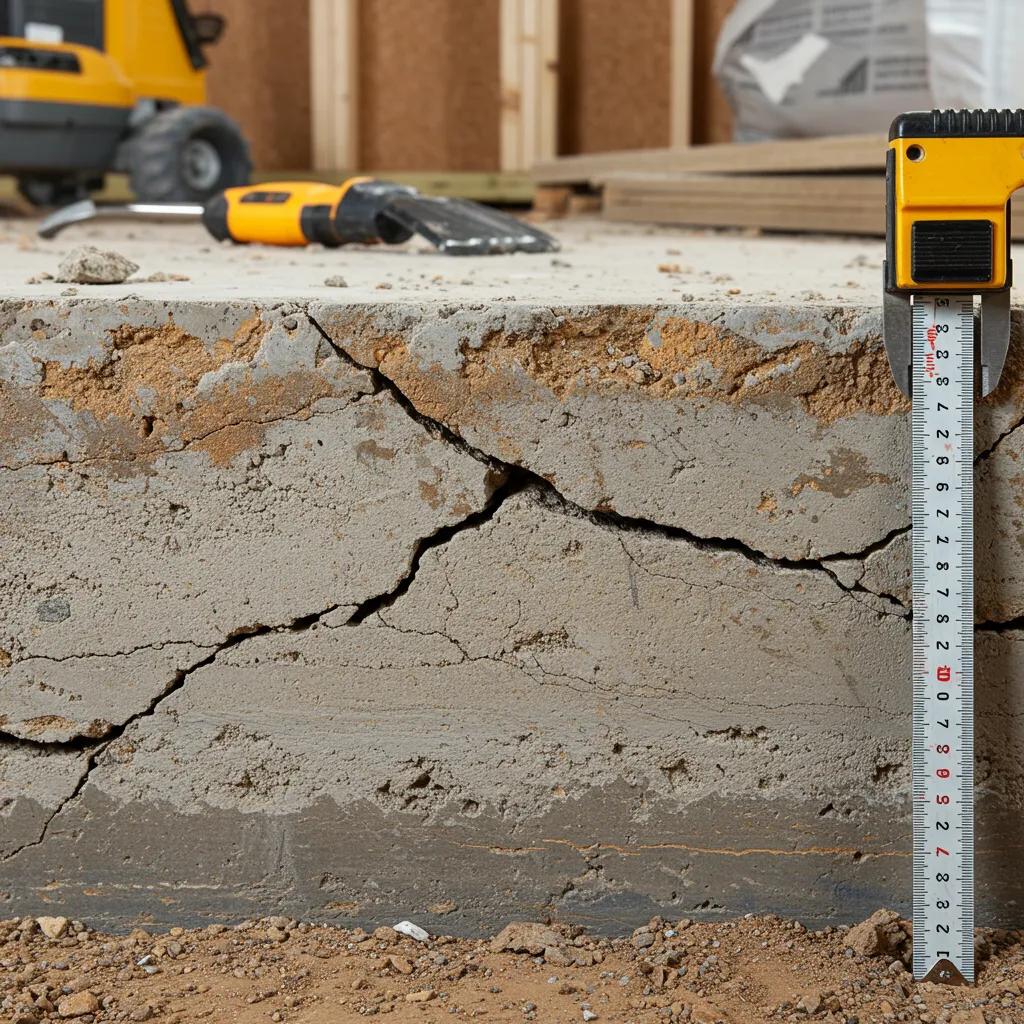
Foundation issues in new homes commonly present as hairline to structural cracks, localized settlement, and misaligned doors or windows, indicating movement or inadequate support. Causes include poor soil compaction, expansive soils, insufficient footings, or improper grading and drainage that concentrate water near the foundation. Consequences range from cosmetic cracking to serious structural instability that can reduce resale value and increase repair costs. Early identification through level checks, visible crack mapping, and moisture assessment allows buyers to request targeted remediation before cosmetic finishes conceal the damage.
These foundation signs connect to grading and drainage indicators that reveal improper site water management.
H3: What Plumbing Defects Are Common in New Builds?
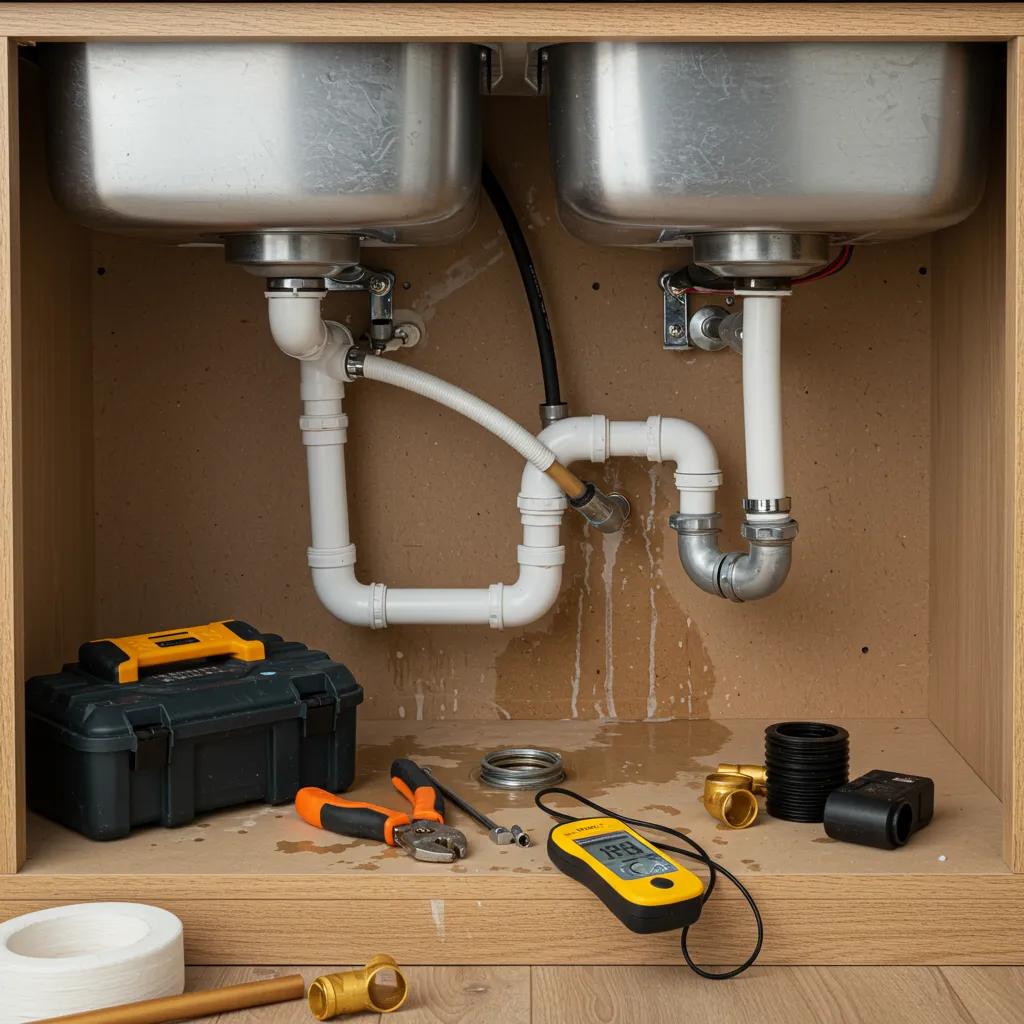
Common plumbing defects include poorly supported pipes, incorrect slope on drain lines, connection failures at fittings, and concealed leaks behind finishes that only become apparent after occupancy. Observable indicators are staining, persistent dampness, odors, or low water pressure, but some leaks require camera scopes or moisture meters to confirm. If left uncorrected, hidden leaks increase the risk of mold growth and cause extensive damage to finishes, leading to warranty disputes. Immediate containment, documented photo/video evidence, and timely repair requests reduce long-term costs and health risks.
Plumbing defects often coexist with electrical and HVAC installation issues that affect system integration.
H3: Which Electrical Problems Should Buyers Watch For?
Electrical problems to watch for include loose receptacles, improper breaker configurations, double-tapped breakers, inadequate panel labeling, and undersized or improperly routed wiring. These issues create a direct fire and shock risk and may constitute electrical code violations that require remediation by a licensed electrician. Detectable signs during walkthroughs include warm panels, tripped breakers, or inconsistent outlet performance; however, hidden wiring faults sometimes need verification by a professional electrician. Prioritized documentation of these hazards enables buyers and agents to push for corrective action before closing.
Electrical findings often require specific remediation language in the inspection report to support builder negotiations.
H3: How Do HVAC Installation Errors Impact Home Performance?
HVAC installation errors—such as incorrect equipment sizing, ductwork leaks, poor balancing, and inadequate insulation—lead to uneven temperatures, reduced efficiency, and shortened equipment life. These problems increase utility costs and degrade occupant comfort while potentially allowing moisture issues in ducts or plenums. Inspectors assess system sizing, airflow, duct sealing, and thermostat placement to identify performance deficits. Early corrections, such as duct sealing, proper balancing, and right-sizing equipment, prevent premature replacement and improve long-term energy performance.
HVAC observations should be corroborated with thermal imaging and airflow measurements to inform repair priorities.
H3: What Roofing Issues Are Frequently Discovered?
Roofing defects commonly include misinstalled flashing at penetrations and valleys, improper nail patterns, poorly seated shingles, and inadequate ventilation that collectively create pathways for water intrusion. In coastal or humid climates, improper roof details accelerate rot and staining and increase the risk of interior moisture intrusion. Drone inspection extends visual access to steep or complex rooflines, while thermal imaging can indicate wet decking or insulation voids. Early roof repairs, correct flashing installation, and ventilation fixes protect interior finishes and structural elements from long-term deterioration.
Roof findings usually prompt immediate documentation for builder correction and may require follow-up exterior verification.
How Can You Identify and Address Foundation Issues in New Construction Homes?
Identifying foundation issues relies on visual inspection, simple measurement, and targeted instruments. This process works by correlating visible symptoms with underlying causes to prioritize remediation. Key detection methods include crack mapping, level or laser checks for settlement, moisture readings along the slab perimeter, and observation of grading and downspout discharge. The goal is to determine whether cracks are cosmetic (shrinkage) or structural and to identify corrective actions such as improving drainage, regrading, or structural underpinning. Accurate documentation supports buyer negotiations and warranty claims.
Detection tools and their outputs connect directly to evidence used in remediation requests.
H3: What Causes Foundation Cracks and Uneven Settling?
Foundation cracks and settling stem from poor soil compaction, expansive clays, inadequate footings, or prolonged water exposure that weakens supporting soils. Environmental factors—including heavy seasonal rainfall and improper grading—change load distribution and cause differential movement that appears as stepped or horizontal cracking. Construction process factors, such as rushed concrete cure times or skipped soil stabilization, can also lead to future movement. Identifying the root cause requires linking observed crack patterns to site conditions and construction records to select the appropriate remediation approach.
Cause analysis informs whether repair needs structural engineering input or drainage corrections.
H3: What Are the Signs of Improper Grading and Drainage?
Signs of improper grading and drainage include soil sloping toward the foundation, standing water near the slab, downspouts discharging close to the house, and erosion near footings. Observable evidence also includes saturated soil, gutter overflow locations, and landscaping that channels water toward the building envelope. Proper grading should slope away from the foundation at a recommended minimum pitch; deviations suggest corrective grading or extension of downspouts. Documenting these signs with measurements and photos strengthens the case for builder action.
Understanding grading errors leads to practical negotiation steps when presenting findings to builders.
H3: How Should Buyers Approach Builders to Fix Foundation Problems?
Buyers should present documented inspection findings, including prioritized photos, measurement notes, and recommended remediation steps, and request a written repair plan with timelines from the builder. Effective negotiation language is factual and specific: cite documented cracks, moisture readings, and grading issues, request defined corrections (e.g., regrade to specified slope or install French drains), and propose reasonable deadlines for completion. If the builder’s response is insufficient, buyers can escalate through warranty processes or obtain third-party structural evaluation for severe concerns. Maintaining a clear paper trail ensures accountability and supports future warranty enforcement.
Well-documented, instrumented evidence increases the likelihood of corrective action and helps determine whether specialist work is warranted.
H3: How Does Damngood Inspection Detect and Document Foundation Defects?
Damngood Inspection detects foundation defects using visual mapping, level checks, moisture readings, and HD photo/video documentation to capture crack patterns and site drainage conditions. Infrared thermal imaging can reveal cooler, moisture-laden zones adjacent to foundations, while drone imagery documents roof-to-grade relationships and inaccessible areas of the site. Reports are delivered the same day with high-resolution photos and video clips that prioritize safety and structural concerns, enabling buyers and agents to present precise evidence to builders for negotiation and warranty claims. This structured evidence supports clear remediation requests and follow-up verification.
These documentation practices directly support the repair steps and follow-up inspections outlined in later sections.
How to Detect and Resolve Plumbing and Electrical Defects in New Homes?
Detecting plumbing and electrical defects combines observable signs with diagnostic tools to convert suspicion into documented findings warranting repair. For plumbing, video-scopes, moisture meters, and pressure tests reveal hidden leaks and improper slopes; for electrical, visual panel inspection, device testing, and circuit tracing identify unsafe wiring practices. Immediate actions include containment for active leaks, de-energizing unsafe circuits, and obtaining licensed contractor estimates for corrective work. Integrating evidence from infrared thermal imaging and HD photos accelerates remediation and protects buyer and agent interests.
The following subsections break down common plumbing failures, electrical code issues, HVAC risks, and how technology finds hidden problems.
H3: What Are Common Plumbing Leaks and Installation Errors?
Common plumbing failures in new builds include loose fittings, unsupported runs that stress joints, incorrect pitch on drain lines that cause backups, and defective fixture connections that leak over time. Detectable indicators include water stains, musty odors, visible drips, or decreased fixture performance, but concealed leaks often require camera inspection to confirm. Short-term mitigation involves shutting off affected systems, capturing photographic evidence, and notifying the builder with specific locations and recommended corrective repairs. Prompt correction prevents mold growth and extensive finished-material replacements.
Documenting the leak source and extent with video evidence is essential for builder negotiations and warranty claims.
H3: How to Spot Electrical Wiring Errors and Code Violations?
Spot electrical issues by checking for loose outlets, inconsistent device function, missing panel labels, warm panels, and breakers that trip frequently, as these suggest wiring errors or overloaded circuits. Observing double-tapped breakers, exposed splices, or non-code installations signals the need for licensed electrician intervention and possible rework. For safety, recommend immediate electrical evaluation when signs of overheating or sparking appear and document findings with photos and inspector notes. Electrical hazards should be prioritized in any repair list due to their direct safety implications.
Noting these items in a prioritized report helps agents and buyers demand corrective action before occupancy.
H3: What Are the Risks of Ignoring HVAC Installation Problems?
Ignoring HVAC installation problems results in higher energy bills, reduced comfort, uneven temperatures, and premature system failure that shortens equipment lifespan. Poorly sealed ductwork spreads dust and moisture and can promote microbial growth, while incorrect equipment sizing forces constant cycling and stresses components. Quantifying impacts through airflow measurements and infrared scans pinpoints performance gaps that warrant remedial measures like duct sealing or system resizing. Addressing HVAC errors early protects indoor air quality, lowers operating costs, and extends equipment life.
HVAC remediation often requires coordinated mechanical contractors and follow-up verification to confirm corrected performance.
H3: How Does Damngood Inspection Use Technology to Find Hidden Plumbing and Electrical Issues?
Damngood Inspection combines infrared thermal imaging, moisture meters, borescope cameras, and HD photo/video capture to reveal concealed plumbing leaks and electrical hot spots that visual inspection misses. Infrared thermal imaging highlights temperature anomalies consistent with moisture or overloaded components; camera scopes inspect inside drain lines and wall cavities; and high-resolution photos document exact fault locations for builder requests. Same-day reports package these deliverables with clear remediation recommendations, enabling buyers and agents to present prioritized evidence to builders and contractors for fast corrective action.
This combination of technology and rapid reporting reduces dispute time and speeds warranty resolution.
What Are the Most Frequent Roofing and Exterior Problems in New Construction?
Roofing and exterior defects in new construction typically involve flashing errors, shingle misinstallation, inadequate ventilation, and improper siding attachment or sealing. These issues often relate to regional risks such as Florida humidity and storm exposure. The mechanism of failure frequently starts with small gaps or misaligned flashing that allow moisture intrusion, which escalates in humid climates to rot and mold behind finishes. Inspectors use drone inspection, thermal imaging, and close visual checks at penetrations to identify vulnerabilities. Early repairs of flashing and proper grading protect the building envelope and reduce long-term remediation costs.
Below are detailed signs and regional considerations for exterior defects, followed by tools used to capture evidence.
H3: How to Identify Roof Installation Flaws and Flashing Defects?
Identify roof flaws by examining shingle alignment, nail patterns, condition around penetrations, and the integrity of valley and step flashing. Gaps, bent flashing, or missing sealant are telltale signs. Drone imagery reveals inconsistencies on steep slopes and behind parapets that are unsafe to access manually. Thermal imaging can expose wet decking beneath shingles or insulation voids adjacent to roof leaks. Documenting these defects with aerial photos and thermal stills allows buyers to request specific flashing repairs or shingle replacement before water damage manifests inside.
Detecting flashing defects connects directly to how repairs should be specified and verified by follow-up inspection.
H3: What Drainage and Siding Issues Affect New Homes in Florida?
In Florida, high humidity, heavy seasonal storms, and salt exposure exacerbate drainage and siding failures when grading and downspout placement are inadequate or when siding attachments allow water intrusion. Common issues include gutters overflowing during rains, downspouts terminating too close to foundations, and siding gaps that admit moisture into wall assemblies. Preventative measures include ensuring positive slope away from the structure, extending downspouts, and specifying water-managed siding systems. Documenting these items during inspection prevents future rot and reduces warranty disputes tied to climate-driven deterioration.
Regional considerations often require combining grading fixes with exterior sealing and siding correction to fully mitigate water risk.
H3: How Can Buyers Ensure Proper Roof and Exterior Repairs?
Buyers should require photographic proof of repair, a written scope that lists materials and workmanship standards, and a timeline for completion, then schedule a follow-up inspection to confirm repairs meet acceptance criteria. Acceptance criteria can include manufacturer-approved flashing methods, verified shingle placement, proper flashing at penetrations, and evidence of corrected grading and downspout extensions. Requesting a documented sign-off and warranty updates ensures long-term accountability from builders or contractors. A follow-up inspection after repairs is essential to validate the work and close the issue in writing.
Clear repair acceptance criteria and verification steps minimize rework and protect resale value.
H3: How Does Damngood Inspection Use Drone and Thermal Imaging for Exterior Inspections?
Damngood Inspection deploys drone inspection and infrared thermal imaging to safely access and evaluate roof surfaces, flashing details, and exterior envelope anomalies that are difficult to inspect from ground level. Drones capture high-resolution aerial photos and video that document flashing gaps, shingle patterns, and roof penetrations, while thermal imaging detects underlying moisture or insulation voids. These deliverables are included in same-day reports as HD images and annotated video clips, enabling buyers and agents to present precise evidence to builders for timely corrective action. This approach increases safety, reduces missed defects, and expedites negotiations.
The ability to produce clear aerial and thermal evidence strengthens repair requests and follow-up verification.
What Interior and Structural Framing Flaws Should New Home Buyers Know About?
Interior and structural framing flaws include drywall defects, insulation gaps, window and door misalignment, and framing errors like missing fasteners or improper bracing. These problems affect comfort, safety, and value. Detection combines visual finish inspection with instrumented checks—like thermal imaging for insulation voids—and structural review to identify undersized members or poor nailing patterns. Cosmetic finish issues can also indicate deeper framing or moisture problems that require structural attention. Documentation of interior defects supports warranty work and helps prioritize safety-related concerns for immediate action.
The subsections below provide checklists for recognizing finish and framing problems and explain how they impact safety and value.
H3: How to Recognize Drywall, Insulation, Window, and Door Installation Flaws?
Recognize interior finish defects by checking for uneven seams, nail pops, hairline cracks, drafts around windows and doors, and thermal anomalies that suggest insulation voids. Window and door misalignment often manifests as binding, uneven gaps, or weatherstripping failures that allow drafts and moisture. Thermal imaging can reveal insulation gaps behind finished walls, while simple door/window operation tests identify misaligned frames. Prioritize defects that affect weather resistance and interior comfort, and document them with photos and thermal evidence for builder repair requests.
Linking finish defects to underlying framing or moisture problems clarifies appropriate remediation steps.
H3: What Structural Framing Errors Are Common in New Builds?
Structural framing errors include incomplete nailing patterns, missing diagonal bracing, undersized headers, and omitted shear walls that compromise load distribution and lateral stability. These errors stem from workmanship lapses or deviations from engineered plans and can lead to long-term movement or increased stress on structural members. When suspected, framing concerns warrant immediate review and often structural engineer consultation to define corrective measures. Accurate documentation of missing fasteners, irregular spans, or altered framing provides the basis for required structural corrections under warranty.
Determining when to involve a structural engineer depends on the severity and pattern of observed framing irregularities.
H3: How Can These Interior and Structural Issues Affect Home Safety and Value?
Interior and structural issues influence safety through compromised load paths, increased risk of door/window failure, and potential for moisture-related deterioration. They affect value by reducing marketability and increasing future maintenance costs. Cosmetic defects alone can lower perceived quality, but when finish issues point to deeper framing or moisture problems, the financial and safety stakes escalate. Buyers who secure documentary evidence of interior and structural defects can demand appropriate corrective work or adjust negotiation terms to protect their long-term investment. Prioritizing safety-related structural repairs preserves occupant welfare and resale prospects.
Clear, evidence-based remediation maintains the home’s structural integrity and market value.
H3: How Does Damngood Inspection Document and Report Interior and Structural Defects?
Damngood Inspection documents interior and framing defects with prioritized findings, annotated HD photos, video walkthroughs, and thermal images where applicable, presenting recommendations in a same-day report format. Reports include a clear description of each defect’s severity, suggested remedial actions, and photographic evidence to support builder communications and warranty claims. Prioritization distinguishes safety-critical items from cosmetic concerns so buyers and agents can focus negotiations effectively. This reporting structure helps ensure repairs are specific, timely, and verifiable via follow-up inspection.
Structured reports enable efficient negotiation and targeted follow-up to close out repair items.
How Can Real Estate Agents Benefit from Recommending New Construction Inspections?
Real estate agents benefit from recommending new construction inspections by protecting their clients, reducing post-sale disputes, and reinforcing their role as a trusted advisor. The mechanism is education plus documentation that prevents surprises. Agents who incorporate inspection resources into their workflow can lower transaction risk and preserve their reputation by ensuring buyers receive transparent condition assessments and prioritized repair lists. Fast-reporting, evidence-backed findings enable agents to negotiate repairs efficiently and coordinate warranty documentation. Agents who partner with inspectors gain streamlined access to deliverables that support their fiduciary duties and client satisfaction.
The following resources and workflow examples explain how agents can operationalize this benefit.
H3: Why Do Inspections Help Agents Protect Their Clients and Reputation?
Inspections help agents by surfacing issues before closing that might otherwise become post-sale disputes, preserving client trust and avoiding liability stemming from undisclosed defects. Documented inspection findings create an objective record to guide negotiations, limit ambiguity, and demonstrate proactive advocacy for the buyer. Preventing surprise repairs after closing reduces reputational risk and supports smoother closings, which reflect positively on the agent’s competence. Agents who routinely recommend inspections position themselves as diligent advisors who minimize client exposure and transactional friction.
These reputational benefits motivate agents to adopt standardized inspection referral processes and educational tools.
H3: What Resources Can Agents Use to Educate Buyers About Inspection Importance?
Agents can use checklists, phase inspection timelines, sample report excerpts, and concise FAQ one-pagers to educate buyers on inspection value and timing. These materials clarify expectations and reduce buyer anxiety. Suggested resources include a pre-drywall checklist, final-walkthrough guide, prioritized defect examples, and sample negotiation language for builder requests. Providing these materials early helps buyers understand why inspections protect investment and how evidence is used in repair negotiations. Co-branded one-sheets or checklists tailored to new construction can streamline client education and referral conversion.
Providing clear resources improves buyer decisions and strengthens the agent-inspector collaboration.
H3: How Can Agents Collaborate with Damngood Inspection for Seamless Service?
Agents can collaborate with Damngood Inspection by integrating a referral workflow: recommend a New Construction Inspection, schedule phase and final inspections with client consent, and request same-day report delivery to expedite repair negotiations. Damngood Inspection’s New Construction Inspection service delivers same-day reports with HD photos, videos, infrared imaging, and prioritized remediation recommendations, enabling agents to present concise evidence to builders quickly. Agents should request sample report excerpts and co-branded checklists to share with clients and outline expected turnaround for reporting and follow-up verification. This process reduces delays and enhances client satisfaction during new build transactions.
A simple referral workflow plus fast reporting ensures agents can protect clients and close transactions efficiently.
What Are the Next Steps After Identifying Common New Construction Defects?
After inspection findings are identified, follow a clear, sequential process: communicate findings with evidence, request specific remediation, verify repairs with follow-up inspection, and escalate to warranty processes if necessary. The mechanism focuses on documentation-first negotiation—present photos, thermal images, and prioritized lists to the builder and set reasonable repair timelines. For complex or structural issues, involve specialists (e.g., structural engineer, licensed electrician) to define corrective scopes that the builder should follow. Maintaining a documented timeline and follow-up verification ensures repairs are completed to acceptable standards.
The practical steps below give template actions agents and buyers can take immediately after receiving inspection reports.
H3: How to Communicate Inspection Findings to Builders and Contractors?
Communicate findings by sending a concise packet containing the prioritized inspection report excerpts, annotated photos/videos, and a clear list of recommended repairs with proposed deadlines. Use factual language that references evidence (e.g., “see photo 3: step crack at northeast corner, 1/8 inch width, measured 2/5/2025”) and request a written repair plan and schedule. Keep records of all communications and request confirmation of repair methods and materials to ensure accountability. If builders propose alternative fixes, require detailed descriptions and accept only documented remedies that address the root cause.
Clear, evidence-driven communication increases the likelihood of timely and effective builder corrections.
H3: When Should Buyers Consider Follow-Up or Phase Inspections?
Buyers should schedule phase inspections at pre-drywall, post-mechanical, and final stages and use follow-up inspections after any significant repairs to verify proper completion. This cadence maximizes early detection and minimizes rework. Follow-up inspections should confirm that specified corrective actions were performed per the agreed scope and that safety-critical items are resolved. When repairs are deferred or partial, set milestones for reinspection and retain photographic verification in the transaction record. Regular phase and follow-up inspections preserve negotiation leverage and ensure work is completed before final acceptance.
A scheduled follow-up policy closes the loop on repairs and protects buyers from recurring issues.
H3: How to Book a Comprehensive New Construction Inspection with Damngood Inspection?
To book a New Construction Inspection with Damngood Inspection, request the service for the desired phase—pre-drywall or final—and expect a transparent price range of $450 – $800, depending on scope and property size. The inspection delivers same-day reports featuring HD photos and video, infrared thermal images, prioritized findings, and clear remediation recommendations that support buyer and agent negotiations. On inspection day, expect a thorough visual and instrumented review of foundation, plumbing, electrical, HVAC, roof, and interior framing, with documentation focused on safety and warranty needs. After booking, coordinate inspection timing with builder walkthroughs and agent schedules to ensure effective access and evidence collection.
This booking pathway provides buyers and agents with predictable cost expectations, fast report turnaround, and the documentation needed to protect investments.
/custom html